
Embracing a plant‑forward and flexitarian lifestyle means filling your plate with vibrant vegetables, legumes, whole grains, and occasional animal‑based proteins. The beauty of this approach is its flexibility—you can enjoy the health benefits of a largely plant‑based diet while still savoring the flavors you love. Below is a data‑driven, step‑by‑step guide that walks you through growing the essential ingredients for these plates and turning them into delicious, balanced meals. Each step includes practical tips and small actions you can take right away to guarantee success.
Why Choose Plant‑Forward & Flexitarian Plates?
Recent studies show that diets rich in plant foods reduce the risk of heart disease, type 2 diabetes, and certain cancers. A flexitarian pattern adds the benefits of occasional high‑quality animal protein, which can improve iron and B12 intake for those who need it. By growing your own produce, you cut down on food miles, boost nutrient density, and gain a deeper connection to what you eat.
Getting Started: Planning Your Garden
1. Assess Your Space and Light
Measure the area you have—whether it’s a balcony, a windowsill, or a backyard plot. Use a light meter app or simply observe the sun’s path for at least a week. Most vegetables for plant‑forward plates (tomatoes, beans, leafy greens) need 6‑8 hours of direct sunlight. If you have limited sun, consider shade‑tolerant crops like kale, Swiss chard, and peas.
Action tip: Sketch a simple garden layout on graph paper, marking sunny vs. shady zones. Allocate the sunniest spots to fruiting crops (tomatoes, peppers) and the shadier corners to leafy greens.
2. Choose Soil and Containers
For in‑ground beds, test the pH (ideal range 6.0‑6.8). Amend with compost or well‑rotted manure to improve structure and fertility. If you’re using containers, select pots with drainage holes and fill them with a high‑quality potting mix that contains perlite or vermiculite for aeration.
Action tip: Add a handful of worm castings to each pot or bed; they boost microbial activity and provide slow‑release nutrients.
3. Pick High‑Yield, Low‑Maintenance Varieties
Data from the USDA shows that certain cultivars consistently outperform others in yield and disease resistance. For a plant‑forward plate, focus on:
- Tomatoes: ‘Early Girl’ (early harvest) or ‘Roma’ (great for sauces).
- Beans: ‘Provider’ (bush) and ‘Kentucky Wonder’ (pole).
- Leafy Greens: ‘Buttercrunch’ lettuce and ‘Lacinato’ kale.
- Herbs: Basil, cilantro, and parsley for fresh flavor.
Action tip: Purchase seeds from a reputable source and label each packet with planting date and expected harvest window.
Step‑by‑Step Guide to Growing Key Ingredients
Step 1: Seed Starting
Start seeds indoors 6‑8 weeks before the last frost date. Use a seed‑starting tray, fill with seed‑starting mix, and sow at the depth indicated on the packet. Keep the soil moist (not soggy) and provide 12‑14 hours of light using a grow light or a sunny windowsill.
Tip: Rotate trays daily to prevent seedlings from leaning toward the light source.
Step 2: Transplanting
When seedlings have two true leaves and the outdoor temperature stays above 50 °F (10 °C) at night, harden them off by placing them outside for 2‑3 hours each day, increasing exposure over a week. Transplant into prepared beds or larger containers, spacing according to the seed packet (e.g., 24 inches for tomatoes, 4 inches for lettuce).
Tip: Add a “donut” of compost around the base of each plant to retain moisture and feed roots.
Step 3: Watering & Mulching
Consistent moisture is crucial. Use a drip‑irrigation system or a soaker hose to deliver water at the soil level, reducing leaf wetness and disease risk. Apply a 2‑inch layer of organic mulch (straw, shredded leaves) after planting to conserve water, suppress weeds, and regulate soil temperature.
Tip: Check soil moisture with your finger—if the top inch feels dry, it’s time to water.
Step 4: Feeding
Every 4‑6 weeks, side‑dress beds with a balanced organic fertilizer (e.g., 10‑10‑10) or a liquid seaweed extract for a micronutrient boost. For beans and peas, a low‑nitrogen fertilizer works best, as excess nitrogen encourages foliage over pods.
Tip: Use a rain gauge to track rainfall; adjust supplemental watering accordingly to avoid over‑watering.
Step 5: Pest Management
Monitor plants weekly. Common pests include aphids, spider mites, and cabbage worms. Employ integrated pest management (IPM): hand‑pick large insects, introduce beneficial insects (ladybugs, lacewings), and spray a neem‑oil solution if infestations rise.
Tip: Plant “trap crops” such as nasturtium around the perimeter to draw pests away from your main vegetables.
Step 6: Harvesting
Harvest at peak ripeness for optimal flavor and nutrition. Pick tomatoes when they turn fully red (or orange/purple for heirloom varieties). Snap beans when pods are 4‑6 inches long and still crisp. Leafy greens can be harvested leaf‑by‑leaf (cut‑and‑come‑again) or whole heads when they reach 6‑8 inches in diameter.
Action tip: Keep a harvest log noting dates and yields; this data helps refine planting schedules for the next season.
From Garden to Table: Preparing Flexible Meals
1. Build a Balanced Plate
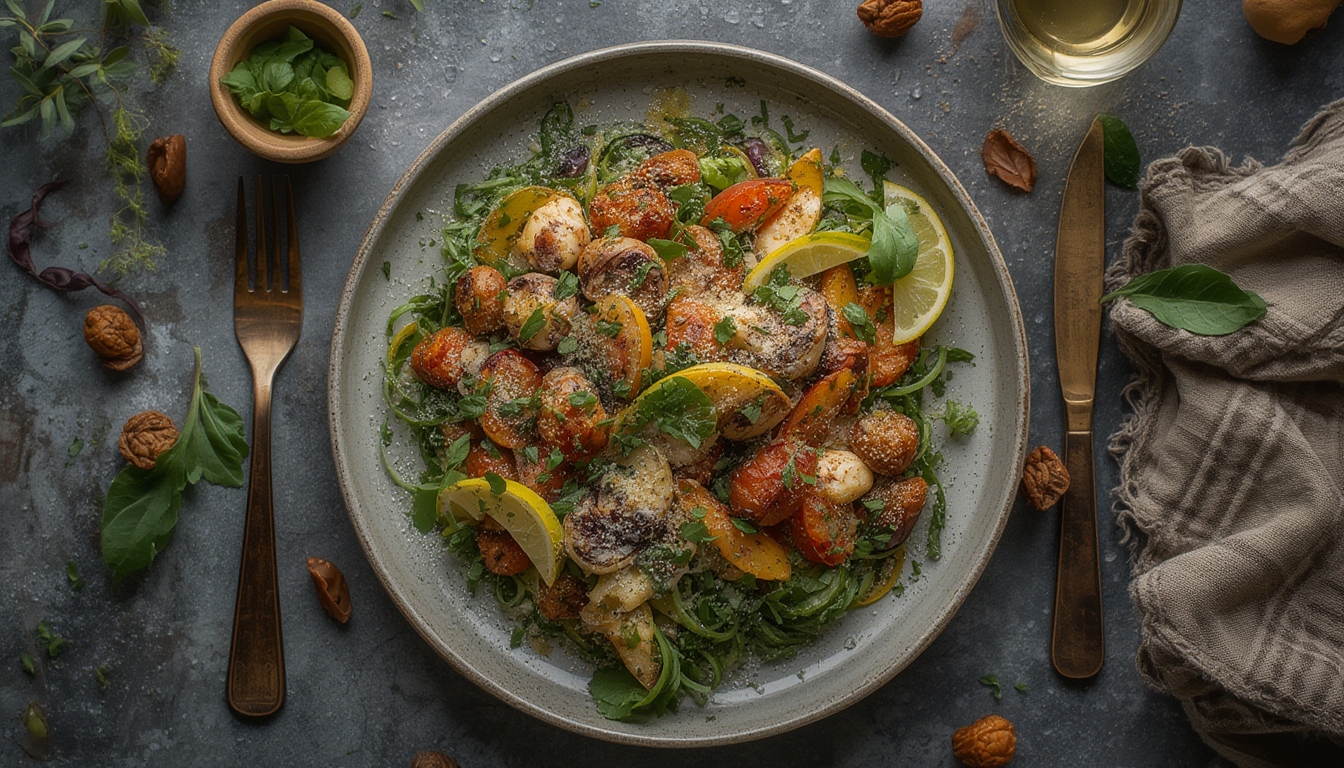
Start with a base of ½ the plate filled with colorful vegetables—raw, roasted, or lightly sautéed. Add ¼ protein: legumes (beans, lentils), tofu, tempeh, or a modest portion of fish or poultry. Finish with ¼ whole grains (quinoa, brown rice, farro). This ratio aligns with research from the Harvard School of Public Health on optimal nutrient distribution.
2. Quick Meal Ideas
- Veggie‑Packed Stir‑Fry: Toss snap peas, bell peppers, and kale in a hot wok with garlic, ginger, and a splash of low‑sodium soy sauce. Add edamame or grilled chicken for protein.
- Hearty Bean Chili: Combine black beans, diced tomatoes, corn, and chili spices. Serve over a scoop of brown rice and garnish with fresh cilantro.
- Roasted Tomato & Basil Pasta: Roast cherry tomatoes with olive oil and thyme. Blend with fresh basil, garlic, and a drizzle of olive oil; toss with whole‑wheat spaghetti and sprinkle with a modest amount of grated Parmesan.
3. Meal Prep for Consistency
Dedicate a Sunday afternoon to batch‑cook grains and legumes. Store them in airtight containers in the fridge for up to five days. Pre‑wash and chop leafy greens, storing them in a dry container lined with paper towels to maintain crispness.
Tip: Label each container with the date prepared; this visual cue reduces food waste.
Maintaining Momentum: Seasonal Tips
Spring
Plant early‑season crops like peas, radishes, and spinach. Use row covers to protect seedlings from late frosts.
Summer
Focus on watering early in the morning to reduce evaporation. Harvest frequently to encourage continuous production, especially for indeterminate tomatoes and beans.
Fall
Plant cool‑season vegetables such as kale, Brussels sprouts, and carrots. Mulch heavily to insulate roots against early frosts.
Winter
If you have indoor space, grow microgreens on a sunny windowsill. They provide a quick, nutrient‑dense boost to any flexitarian plate.
By following these data‑driven steps—from soil preparation to plate composition—you’ll create a sustainable cycle of growing, harvesting, and enjoying plant‑forward meals. The result is a vibrant, flexible diet that supports health, reduces environmental impact, and keeps your taste buds satisfied.