Healthy & functional cooking is more than just choosing the right ingredients—it’s about creating meals that nourish the body, support wellness, and fit seamlessly into a busy lifestyle. By focusing on whole foods, balanced nutrients, and mindful preparation, you can transform everyday dishes into powerful allies for your health. Below, we’ll explore the core principles of functional cooking, walk through a simple, data‑driven recipe, and provide a step‑by‑step guide to growing a versatile kitchen herb—basil—that will elevate your meals with fresh flavor and additional health benefits.
Core Principles of Healthy & Functional Cooking
1. Prioritize Whole, Unprocessed Foods
Data from the Harvard School of Public Health consistently shows that diets rich in whole grains, legumes, fruits, and vegetables reduce the risk of chronic diseases. Choose ingredients in their natural state whenever possible, and limit highly processed items that contain added sugars, refined flours, and unhealthy fats.
2. Balance Macronutrients
Functional meals aim for a balanced distribution of protein, healthy fats, and complex carbohydrates. A common guideline is the 40‑30‑30 rule: 40 % of calories from carbs, 30 % from protein, and 30 % from fats. This balance supports steady blood sugar, sustained energy, and satiety.
3. Incorporate Functional Ingredients
Functional ingredients provide specific health benefits beyond basic nutrition. Examples include:
- Turmeric – anti‑inflammatory properties thanks to curcumin.
- Chia seeds – omega‑3 fatty acids and soluble fiber.
- Leafy greens – high in vitamins A, C, K, and phytonutrients.
- Fermented foods – probiotics that support gut health.
4. Use Cooking Methods That Preserve Nutrients
Steaming, sautéing quickly over medium heat, and roasting are methods that retain vitamins and minerals better than prolonged boiling. When possible, cook vegetables just until tender‑crisp to maintain texture and nutrient density.
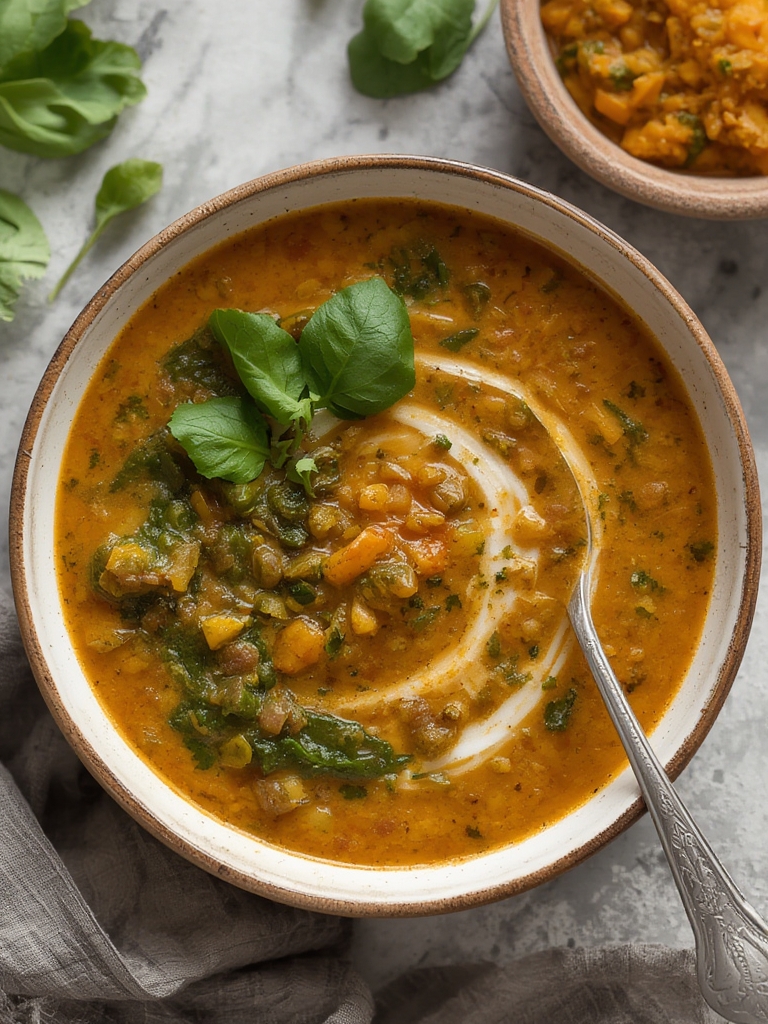
Data‑Driven Recipe: Quinoa Power Bowl with Turmeric‑Roasted Veggies
This recipe follows the 40‑30‑30 macronutrient framework and incorporates functional ingredients for added health benefits. Nutrient analysis (based on USDA data) shows approximately 420 kcal per serving, with 15 g protein, 12 g fat (mostly from olive oil and avocado), and 55 g carbohydrates (including 8 g fiber).
Ingredients (Serves 2)
- 1 cup quinoa, rinsed
- 2 cups water or low‑sodium vegetable broth
- 1 cup cauliflower florets
- 1 cup diced sweet potato
- 1 tbsp olive oil
- ½ tsp ground turmeric
- ¼ tsp black pepper
- 1 avocado, sliced
- ½ cup canned chickpeas, rinsed and drained
- 2 handfuls baby spinach
- 2 tbsp toasted pumpkin seeds
- Juice of ½ lemon
- Salt to taste
Step‑by‑Step Instructions
- Cook the quinoa: Combine quinoa and water (or broth) in a saucepan. Bring to a boil, then reduce heat, cover, and simmer for 15 minutes until liquid is absorbed. Fluff with a fork and set aside.
- Roast the vegetables: Preheat oven to 200 °C (400 °F). Toss cauliflower and sweet potato with olive oil, turmeric, black pepper, and a pinch of salt. Spread on a baking sheet and roast for 20‑25 minutes, turning halfway, until golden and tender.
- Prepare the toppings: While veggies roast, slice avocado, rinse chickpeas, and toast pumpkin seeds in a dry skillet over medium heat for 2‑3 minutes.
- Assemble the bowl: Divide quinoa between two bowls. Top with roasted veggies, spinach, chickpeas, avocado slices, and pumpkin seeds.
- Finish with dressing: Drizzle lemon juice over each bowl, add a final pinch of salt if needed, and serve immediately.
Tip: For extra protein, add a poached egg or a scoop of Greek yogurt on the side.
Growing Fresh Basil at Home: A Step‑by‑Step Guide
Basil is a staple herb in many functional dishes, offering antioxidants like eugenol and vitamin K. Growing basil at home ensures you have a constant supply of fresh leaves, reduces food miles, and adds a therapeutic gardening routine to your week.
Materials Needed
- Pot or container (minimum 6‑inch diameter) with drainage holes
- High‑quality potting mix (well‑draining, organic)
- Basil seeds or a small starter plant
- Watering can or spray bottle
- Sunny windowsill or a grow light (minimum 6 hours of light daily)
Step‑by‑Step Growing Process
Step 1: Prepare the Container
Fill the pot with potting mix, leaving about 1 inch of space at the top. Lightly tap the pot to settle the soil, then water thoroughly until excess drains out. This initial watering helps settle the soil and eliminates air pockets.
Step 2: Plant the Seeds or Starter
If using seeds, scatter them thinly across the surface and cover with a thin layer (≈¼ inch) of soil. For a starter plant, make a small hole deep enough to accommodate the root ball, place the plant, and gently backfill with soil. Press lightly to ensure good soil‑to‑root contact.
Step 3: Provide Adequate Light
Basil thrives in bright, direct light. Place the pot on a south‑facing windowsill or under a grow light positioned 12‑18 inches above the foliage. Aim for 6‑8 hours of light daily; insufficient light leads to leggy growth and reduced flavor.
Step 4: Water Consistently
Keep the soil consistently moist but not soggy. Check the top ½ inch of soil; if it feels dry, water until water drains from the bottom. Over‑watering can cause root rot, while under‑watering stresses the plant and reduces leaf quality.
Step 5: Pinch and Harvest
When the plant reaches 6‑8 inches tall and has at least three sets of leaves, begin harvesting. Pinch off the top set of leaves just above a node (the point where a leaf joins the stem). This encourages bushier growth and prevents the plant from flowering, which can make leaves bitter.
Step 6: Feed Occasionally
Every 4‑6 weeks, apply a diluted liquid fertilizer (½ strength) or a slow‑release organic granule. This supports vigorous growth, especially during the peak summer months.
Step 7: Manage Pests Naturally
Common indoor pests include aphids and spider mites. If you notice them, spray the leaves with a mild solution of water and a few drops of dish soap. Rinse the leaves after 15 minutes to avoid residue buildup.
Practical Tips for Success
- Rotate the pot weekly to ensure even light exposure.
- Trim any flower buds immediately; flowering diverts energy from leaf production.
- Harvest in the morning when essential oils are most concentrated for maximum flavor.
- Use the leaves fresh in salads, pesto, or as a garnish for the quinoa power bowl to boost both taste and nutrition.
Integrating Home‑Grown Basil into Functional Meals
Fresh basil isn’t just a flavor enhancer—it adds phytochemicals that support cardiovascular health and reduces oxidative stress. Here are three quick ways to incorporate your home‑grown basil into the quinoa power bowl and other dishes:
- Pesto drizzle: Blend a handful of basil, ¼ cup olive oil, ¼ cup walnuts, 2 tbsp nutritional yeast, lemon juice, and a pinch of salt. Swirl a tablespoon over the bowl for a creamy, nutrient‑dense finish.
- Herb‑infused water: Add a few basil leaves to a pitcher of water; let steep for 30 minutes. Sip throughout the day for a subtle boost of antioxidants.
- Fresh garnish: Roughly tear basil leaves and sprinkle over soups, stews, or grain salads just before serving to preserve their aromatic oils.
By combining data‑backed cooking techniques with the simple joy of growing your own basil, you create a sustainable loop of health, flavor, and mindfulness. Each step—from selecting whole ingredients to nurturing a thriving herb garden—contributes to a lifestyle where food truly functions as medicine.